Easy Homemade Kimchi
Updated Jul 14, 2021
This Post May Contain Affiliate Links. Please Read My Disclosure
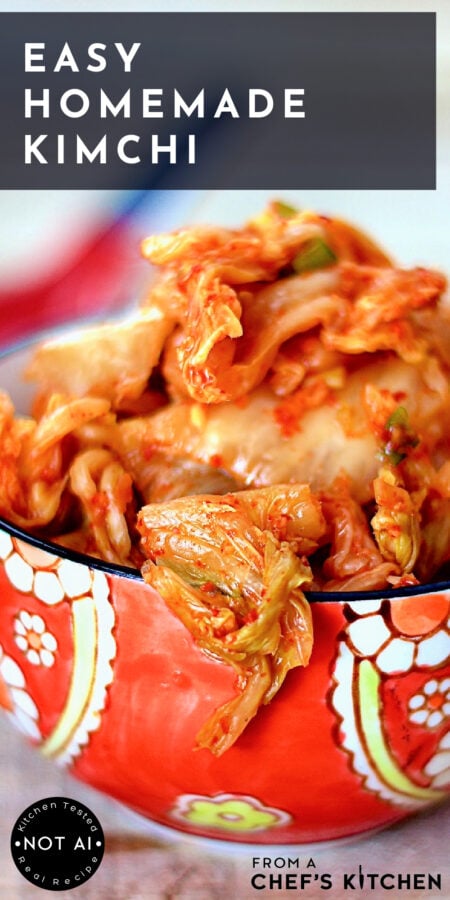
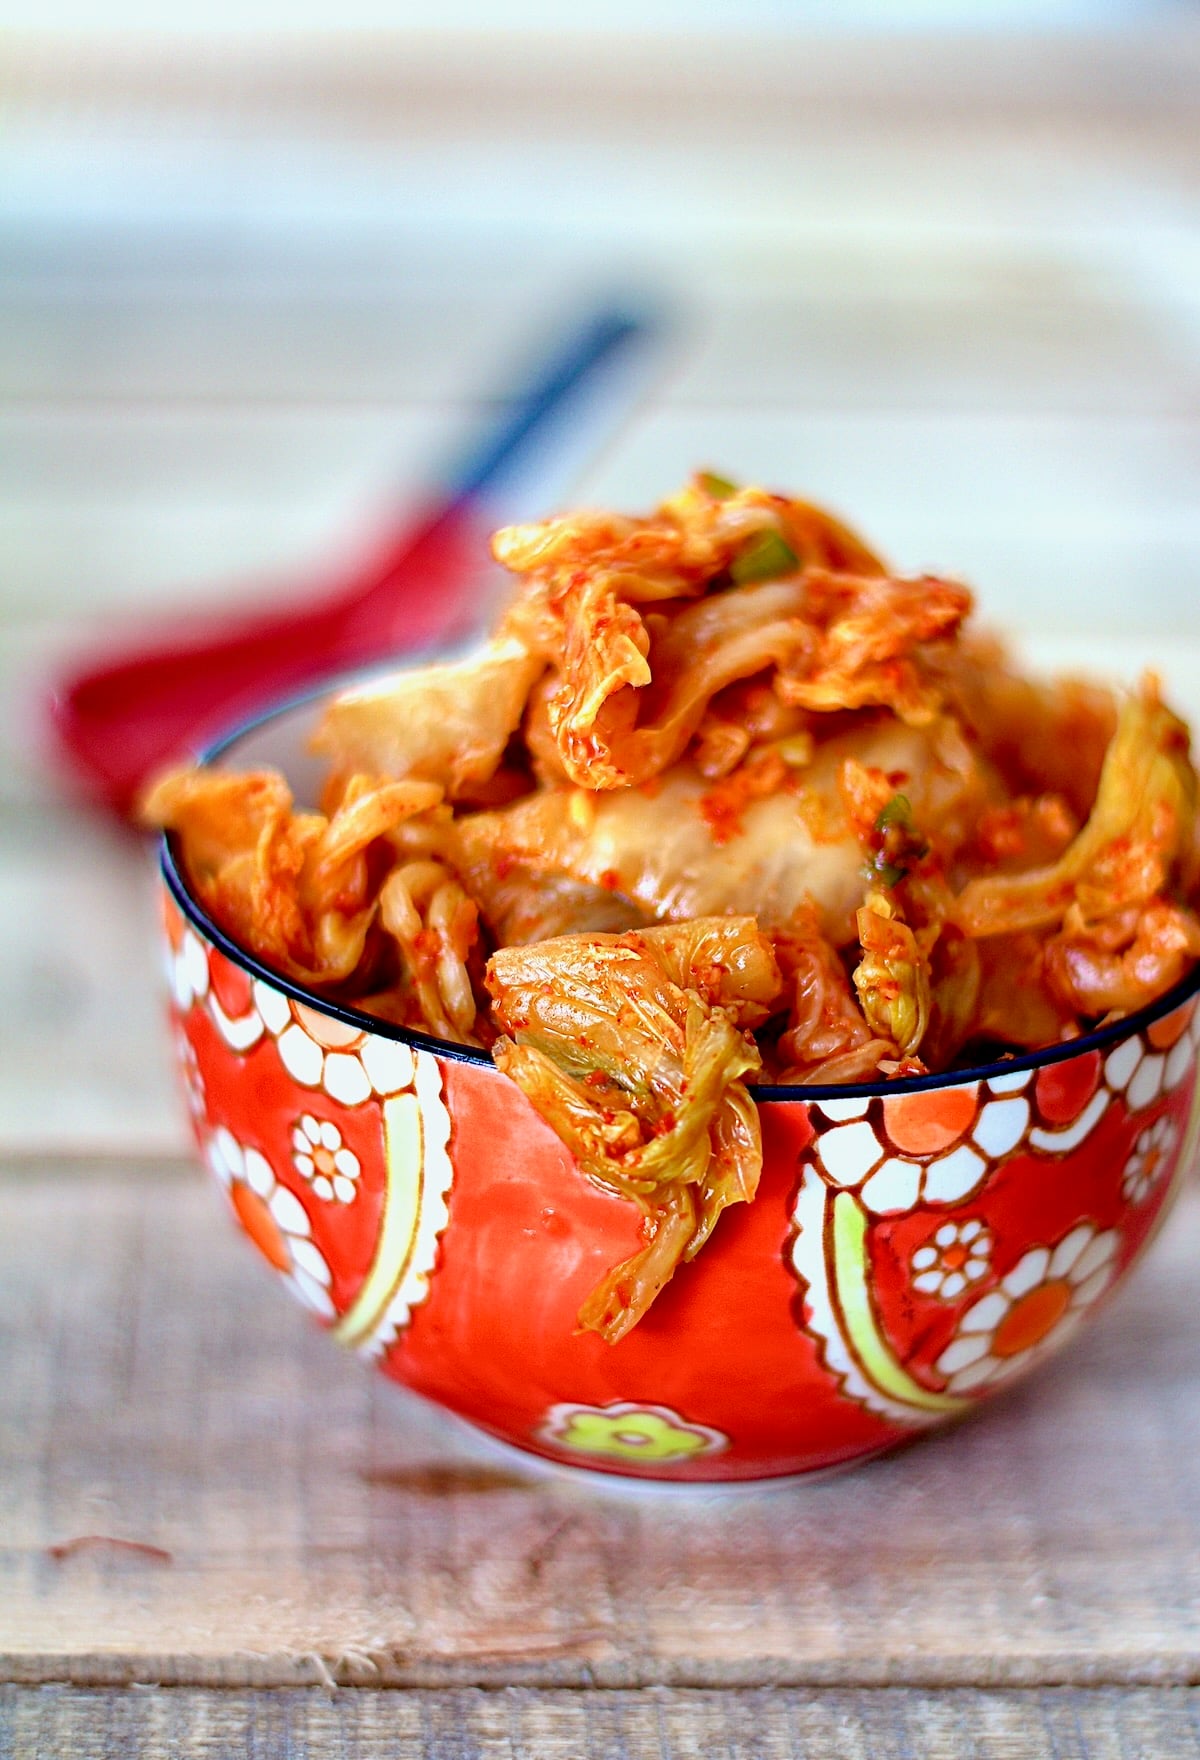
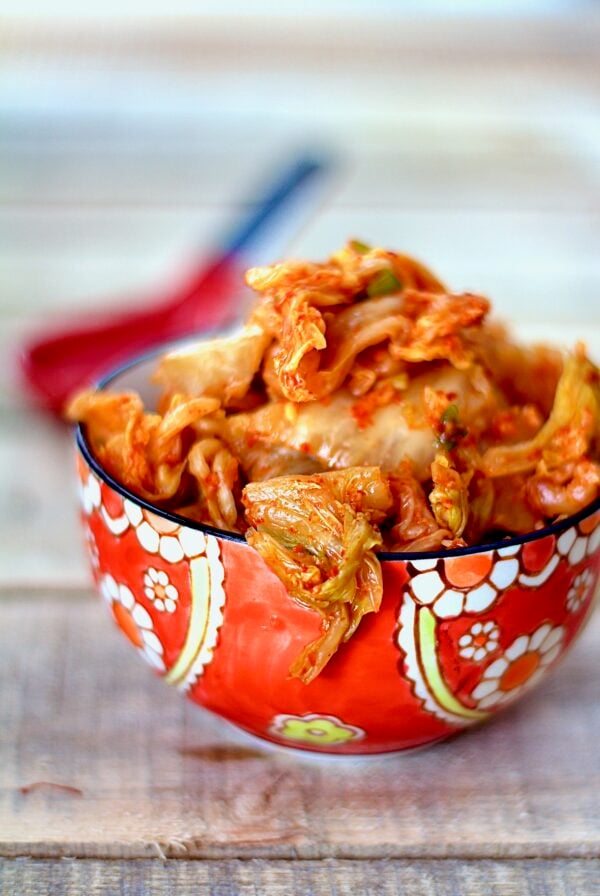
Easy Homemade Kimchi takes a little time, but once you make this delicious Korean side dish yourself, you’ll be hooked! As it ferments, it develops a bold, tangy heat and irresistible crunch that brings vibrant flavor to anything you serve it with!


How to make Easy Homemade Kimchi:
This kimchi takes about a week from start to finish.
- Start with Napa (also known as Chinese cabbage), which is available at any grocery store. I find the best price for it at an international market in my area.
- Each head generally weighs two to three pounds.
- Slice the heads of cabbage into about two-inch rounds, leaving the stem and bottom core behind.
- Take each “round” and loosen it up into a large stainless steel bowl, then salt generously with sea salt.
- Place a dinner plate on top of the cabbage along with another heavy object on the plate.
- Let that sit for 24 hours. The cabbage is going to wilt significantly because of the salt.
- Drain the excess water out several times in the 24-hour period.
- Rinse the wilted cabbage under cold running water.
- Squeeze out all the excess water, add the remaining ingredients, and place in a non-reactive container such as a large glass jar. Close the lid and let it sit on your counter for three days.
- After it has been at room temperature for about 3 days, refrigerate it for 4 days. After that, it’s ready to eat.
Serve kimchi with:
- Korean Braised Chicken Thighs
- Vegan Tofu Lettuce Wraps
- Korean Beef Short Ribs Recipe
- Tuna Kimchi Cakes with Soy-Ginger Dipping Sauce
Get all my pickle and relish recipes at Pickle and Relish Recipes – From A Chef’s Kitchen.
Easy Homemade Kimchi
Easy Homemade Kimchi takes a little time, but once you make this delicious Korean side dish yourself, you'll be hooked! As it ferments, it develops a bold, tangy heat and irresistible crunch that brings vibrant flavor to anything you serve it with!
Ingredients
- 2-3 pounds Napa cabbage
- 2-3 tablespoons coarse sea salt
- 1/4 cup unseasoned rice vinegar, or as needed and to taste
- 2 tablespoons Korean red pepper
- 2 tablespoons honey, or to taste, preferably raw unpasteurized
- 2 tablespoons minced ginger
- 1 bunch scallions, white and light green part only, sliced into 1-inch pieces
Instructions
- DAY 1: Slice cabbage into 2-inch thick rounds, leaving stem end and bottom core behind. Loosen into a stainless steel bowl. Sprinkle with sea salt and toss to combine.
- Set a plate over the cabbage and another heavy object such as a cast iron skillet on top to weigh it down. Set aside for 24 hours. Drain off excess water several times as necessary.
- DAY 2: Rinse the cabbage well under cold running water. Squeeze out as much water as possible.
- Add the rice vinegar, red pepper, honey, ginger and scallion and toss well to combine. Adjust rice vinegar and honey to taste. Cabbage should be somewhat covered with liquid.
- Place in a large non-reactive container such as a glass jar. Close the lid and leave at room temperature for 3 days.
- DAY 5: Place in refrigerator for 4 days.
Notes
Will keep in the refrigerator for 3-4 weeks.
Nutrition
Serving: 1Calories: 28kcalCarbohydrates: 6gProtein: 2gSodium: 1661mgFiber: 1gSugar: 4g
Nutritional values are automatically calculated using unbranded products and are estimates only. Actual results may vary based on ingredients used and portion sizes. Adjust as needed for dietary restrictions, allergies, or health concerns.
 Like this? Leave a comment below!


Making this this weekend! Ordered some gochujang off Amazon. Going to be my first time making it.. can’t wait! I love kimchi and dream of it often (as my mouth currently salivates at the thought of it) thank you for the recipe!
Hi, Candice, I’m a total kimchi fanatic, too and I totally get the mouthwatering thing! 🙂 Hope you enjoy!
This looks great! Have you experimented with adding cucumbers or other vegetables to this? I was just wondering if they too would go through the salting process prior to fermentation…my sense is that they would.
Thanks for this!
Hi, Paul, I have not. I have only done with the cabbage but I would definitely salt the other vegetables, too. I have a three-day weekend coming up so am planning to make a batch of this. I actually go through kimchi “withdrawal.” Hope you enjoy!
Your kimchi has never bubbled because your recipe doesn’t include anything with a sugar content. The recipe I’ve always used includes apple, which produces the bubbles from the broken down sugars for proper fermentation.
Hi, Katie. Thanks so much for your comment. My recipe as posted has honey which is the sugar source.
Some people say the antimicrobial properties of honey may be the cause of that. But if it ferments, it ferments, right?!
I add daikon, shredded carrots, and green onion to mine. Never met a kimchi I didn’t like!
Hi, Sara, Great point about honey. I just made this again about a month ago and drank every last drop today! There are tons of variations on kimchi and this one is super easy! Thanks so much!
In Day 1- you state to put cabbage into a ss bowl and sprinkle with salt. Are you supposed to soak it in salted water or just sprinkle it with the salt? Other recipes call for it to be soaked, please advise.
I’m very curious about this recipe and can’t wait to make it
Thank you
Hi, Brian, Thanks for your question. I salt it very generously and then let it stand; I do not soak it. I double checked the Green Kitchen App recipe and that’s exactly what they do. After letting it sit for 24 hours, then rinse. I need to get going on another batch! I’m craving it now!
This is terrific! Thank you for your recipe. I love the concept of kimchi but I don’t like it spicy. Is it possible to cut back on the amount of the hot peppers, does that affect the fermentation or preservation?
Hi, Sharon, I don’t think cutting back on Korean red pepper affects the fermentation or preservation. The first time I made it it was so wicked hot I couldn’t eat eat. I had to make a plain, unseasoned batch to combine with the first batch and it was fine. It’s possible that a good international market may have different “levels” of heat in Korean red pepper such as mild, medium and get the hose!